Lazy Wheat Bread Recipe

A good loaf of wheat bread in the store averages about $4 but a 10lb bag of flour is only $4.50. In the recipe that follows I only used 6 cups of flour for the doubled recipe. That's 30% of the bag of flour which makes the 3 loaves I made $0.45 each.
When I was a kid I remember my great grandmother who was born in 1889 complaining about the bread she bought in the store. Spreading butter on homemade versus store bought bread is a night and day difference. Homemade bread handles the butter with ease whereas the other usually falls apart. Another difference you'll immediately notice is how homemade bread fills you up quickly.
I've been making homemade bread for a few months and have experimented with varying techniques. Start to finish making wheat bread takes roughly 4 hours since the dough has to rise twice but there are only about 30 minutes of actual hands on work. There is a great deal of satisfaction when you make bread start to finish with your hands. Not only do you get to dissolve your frustrations while you knead the dough, it's reassuring to know if the world goes Tango Uniform you won't rely on anyone else for bread. I decided to call this Lazy Wheat Bread since the mixer does all the work.
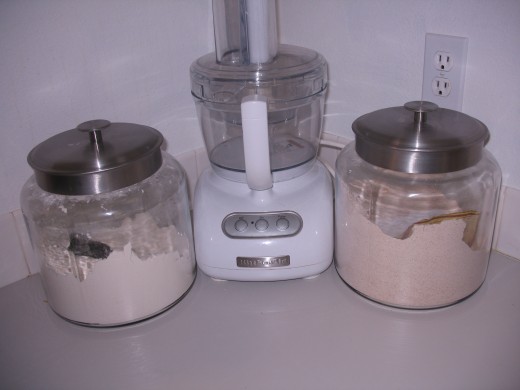
Instead of digging bags of flour from the back of the pantry I bought two large canisters that hold 10lbs of flour each. Now that the flour sits on the counter as a constant reminder I find myself making bread a few times a week. The recipe I use is from the back of a bag of Stone Buhr wheat flour. Initially I had to learn what yeast looked like after it proofed but I've since switched to bread machine yeast. I measure the temperature of the water coming out of the faucet to make sure it is 130 F degrees and simply add it to the dry ingredients without any proofing. If your water isn't that hot boil some water and adjust the temperature accordingly.
The Recipe (Doubled)
- 2 packages of active dry yeast OR 3 tsp if you're using bread machine yeast
- 2 1/4 cups of water (look on the yeast package for the ideal temperature)
- 2 Tablespoons of brown sugar
- 2 Tablespoons of olive oil
- 3 Cups of Whole Wheat Flour
- 3 Cups of Bread Flour
- 2 Teaspoons of salt

I added the dry ingredients and gave the mixer a few turns to mix them together. Then I simply added the water and let the machine knead the dough for a few minutes. This recipe has always worked well and the mixed ingredients don't need much if any at all tweaking. If you've never made bread before the dough should be tacky but not stick to your fingers. Conversely there shouldn't be any dry ingredients left in the bottom of the mixing bowl. The amount of moisture in the air can slightly affect how a dough comes together. If the dough is too tacky simply add more flour or a splash of water if it is too dry. When the dough is completely mixed it should cling to the hook and not the sides of the bowl. The original recipe says to knead it for 8-10 minutes by hand but I only let the mixer run for 5 minutes, or until the dough looked well incorporated and had a smooth texture.

The next step gave me the idea for naming this Hub. I simply took out the dough hook and pressed the dough into the bowl. To keep the dough from drying out I covered the bowl with plastic wrap and then a towel to keep it warm.


Allow the dough to sit for an hour to rise. If you're a busy absent minded mom like myself and forget to knead it or don't want to fire up the mixer during nap time it will still turn out if you go over the hour mark. There are professional chefs who will disagree with that statement due to quality and texture issues but I'm not baking for bread connoisseurs. I'm merely telling you the bread will still rise.

Simply put the hook back on the mixer and knead the dough for another 5 minutes. Repeat the previous steps. Remove the hook, pat down the dough, cover with plastic and a towel. Allow the dough to rise for 45 minutes.
After the second rise pull the dough from the bowl and knead a few times on a lightly floured surface. This is where you get to decide what shape(s) you want to form the dough into. I typically make 3 medium sized loaves but I've also made bread bowls for hearty winter soups. Although the pans are non-stick I still line the pans with parchment paper. Since the paper tends to curl I fold it down the center in the opposite direction of the curl so that it will stay open.


Cover the dough with plastic once again. To keep the plastic from sticking lightly rub olive oil with your fingers or a pastry brush on the top of the dough. Place a kitchen towel on top and let the dough rise for 30-45 minutes.

After the loaves have risen bake them in a 400 F oven for 30-40 minutes. If you prefer a soft crust pull them out after 30 minutes, 40 minutes or longer if you prefer a thicker crust.

This bread is excellent on its own but it can also be used for french toast, sandwiches, croutons, dressing, and bread crumbs. Although making your own bread is not difficult I doubled the recipe due to the amount of time required. I have frozen this bread in zippered freezer bags with great success. A loaf of bread also makes a great little unexpected gift for friends and neighbors.


